vanilla ice cream

This year I've been figuring out how to make ice cream and it was a proud moment when Grace said, Mum let's always make our ice cream now.  That's not to say my ice cream has always met with her approval - there was a lemon ice cream that was too lemony and a frozen yoghurt with horrid bits of nutmeg. Still, most of the time now I get kid approval. I've decided that I like custard based ice creams the best but I make mine with whole eggs as I can't bear the thought of wasting all those egg whites. However I'm beginning to think I might get better results with just egg yolks as apparently you can heat them to a higher heat without curdling. Something to test out one day. I have also found that if your custard is just about to curdle and is no longer silky smooth it could still turn into acceptable ice cream. So if in doubt, churn it and see.

I keep the bowl for the ice cream maker in the back of the freezer so it is ready any time I get the urge to make ice cream or hot night slushies. I have also learnt that it is good not to overfill it. Or an ice cream monster starts coming out the top. Or it doesn't freeze efficiently. We have a 1.5 litre Cuisinart machine and although it does a good job, I would buy the 2 litre one if I was choosing one now.

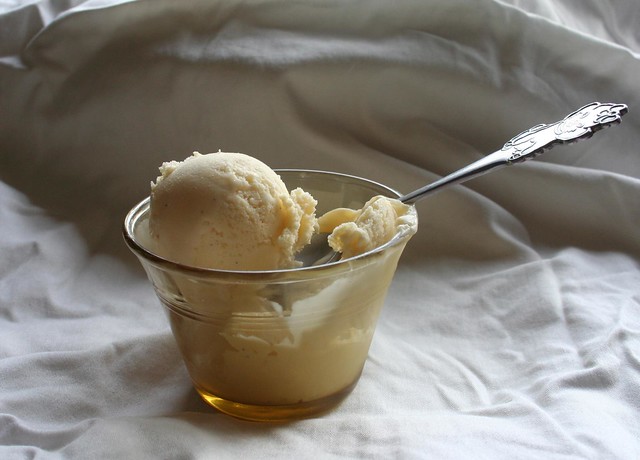
I mostly use half milk and half cream as Grace doesn't like too much of a fatty mouth feel - I often use pouring or thickened cream. If I was using double cream I might up the milk ratio a bit. I have started adding a bit of honey for extra smoothness and it tastes lovely with the vanilla. 3/4 cup of sugar is really enough for 3 cups of liquid but we like our ice cream quite sweet it seems. So you could reduce the sugar a bit. Real vanilla is totally worth it and I bought some from here. Price and quality were both much better the the shops. Had to buy 50 or so beans but oh, to have an abundance of vanilla! And what better way to use it than in vanilla ice cream.

-

Ingredients

1 vanilla pod
3 large eggs
3/4 cup of white sugar
1 tablespoon of honey
1 1/2 cups of milk
1 1/2 cups of thickened or pure cream

To make
  • Combine the milk, cream, sugar, honey, the seeds and pod of the vanilla in a saucepan and heat, stirring a bit, until it just trembles and starts to steam.
  • In a good sized bowl, beat the eggs.
  • Remove the vanilla pod from the cream mix. (I wash and dry to steep in vodka which is my experiment in making vanilla essence - I've heard of them being added to sugar jars too).  
  • With the beater going, add a little of the hot cream mix to the beaten eggs and keep beating. Gradually add the rest of the cream mixture while beating. I use the electric hand beater but a whisk would be fine.
  • If the eggs are a bit organic and look as though they have been fertilised and have little embryos I strain the custard mix at this stage. 
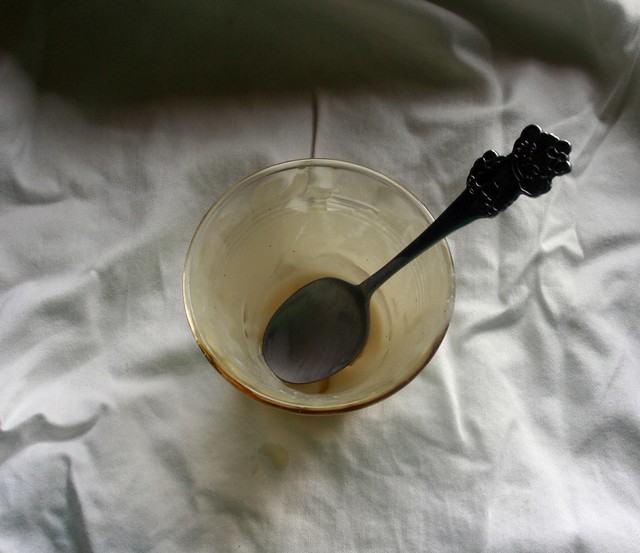
  • Place mix back in saucepan and stirring constantly, cook until the mix coats the back of a spoon and is steaming. Don't let it boil. If I thought I had overcooked the custard or it looked lumpy I might strain at this stage too - but mostly I don't.
  • Place in a plastic container for the fridge and when it has cooled a bit place in the fridge. 
  • In a couple of hours or the next day, add the chilled mixture to the ice cream maker as per the instructions. It normally takes about 35 minutes and I place it in a clean plastic container and into the freezer until we are ready to eat it.
-

ginger beer

I've wanted to make ginger beer for ages. Something to drink when every one else is drinking proper grown up drinks which I mostly avoid because for a whole lot of boring reasons I am a very cheap drunk. There are lots of recipes out there for ginger beer - I cobbled this one together based on what I read, the equipment I have and what makes sense to me. It's still a work in progress but comes out very drinkable most of the time. Don't be tempted to add more yeast for more fizz - I ended up with some bottles on the back step that brewed for two weeks and by the end they were quite alcoholic and very nasty tasting. The best batches taste like a designer ginger beer with a very smooth mouth feel. Some have said it is a little sweet and my dad has said that it's not fizzy enough but others have said it is very good. I think this ginger beer tastes best after it has been in the fridge for about a week. However I've read some accounts that say to keep homemade ginger beer no longer than 3 days. So like you know, all care and no responsibility. But I certainly haven't suffered any ill effects from leaving it longer. I use 2lt plastic orange juice or smaller soft drink bottles which means that the pressure can build with no risk of a dangerous explosion.  It is also very mildly alcoholic.

-

You will need
Preserving pan, saucepan or other receptacle with a lid and at least 3lt capacity
4 x 2lt plastic orange juice bottles or similar
4 cups white sugar
6 tablespoons of finely sliced ginger
1 scant teaspoon dried yeast
juice and some zest of 4 big lemons (use more lemons if they are small)
water
sultanas or sugar

Stage one

  • Place the ginger, lemon juice zest and sugar in recptacle of choice (I use my jamming pan). 
  • Add some water and cook until sugar is dissolved. 
  • Allow to sit for a while after coming off the heat - this will lead to a stronger ginger taste. 
  • Add enough cold water to bring the temperature down to tepid. 
  • Add the yeast and stir. 
  • Cover with lid and leave somewhere for about 24 hours or until there is good yeast activity - the top will bubble a bit.


Stage two

  • Strain the mix. I use a colander and then a fine strainer. 
  • Divide between the four bottles and add cold water leaving a little room at the top of the bottle. 
  • Add a teaspoon of sugar (I use brown sugar at this point for the colour but it doesn't matter) or a couple of sultanas. 
  • Screw the lids on tightly and put on a shelf somewhere. This is when the yeast action together with the pressure of a closed lid will cause carbonation. I've found it takes a bout a day and that the bottle will be bulging. 
  • At this point pop the bottles in the fridge to slow the process down and chill for drinking. The ginger beer is ready to drink at this point but will taste even better in a few days.

broad bean dip

Really more an idea than a recipe. I made this with the last of our home grown broad beans. Big and tough beans they were and I think the floury texture of fully grown broad beans is what made this dip really nice. Quantities are sort of feel as you go. I also usde thyme and mint because that's what we had and they worked really well.

broad bean dip

You will need
  • broadbeans
  • yoghurt
  • lemon juice
  • olive oil
  • garlic 
  • thyme
  • mint
  • salt and pepper
Pod the broad beans and cook in boiling water until tender. Cool enough to remove the tough outer skin of the broadbeans (this is essential and won't take as long as you think). Blend broadbeans, garlic, a good squeeze of lemon juice, a couple of spoons of yoghurt, some olive oil and the herbs. It should take on a smooth texture. Taste and adjust seasoning if necessary. Eat. Yum.

chocolate swirl cheesecake slice

I've recently discovered that cheesecake is popular at social gatherings but as it is hard to cut into lots of pieces, it can be difficult to serve. And besides, it is so rich that most people only want a taste. So cheesecake slice fills that little niche.I wouldn't use cooking chocolate in this, it will be nicer with good quality eating chocolate. Doesn't have to be green and blacks, just whatever is on special that week.

cheesecake slice

Crust

  • 2 x 250g packet of arnotts chocolate ripple biscuits (not plain brand)
  • 250g of melted butter

I crush my biscuits inside a cloth bag with a rolling pin, but if you have a food processor, that would make it a whole lot easier. Just don't crush them too fine. Or your crust won't have texture. Stir in the melted butter. Line one or two slice tins with baking paper, letting the edges hang out. I use two tins, each about 23cm square but a larger slice tin would be fine. Pressed down the base should be about 2-3 cms. Place biscuit mixture into tin and press down with back of spoon, then cover with a sheet of baking paper and roll with a flat sided glass. This will make the base nice and firm. Place in fridge while you make the filling.

Filling

  • 2 x 250g blocks of Philadelphia (or similar) cream cheese softened (back in the day when we had a microwave, I would cut it into chunks and zap briefly)
  • 200ml pure cream
  • 1 tablespoon of gelatine dissolved in 1/2 cup of boiling water and cooled
  • I cup caster sugar (I have used plain white sugar and it works fine, you just have to beat it for longer. Brown sugar would also work fine and taste lovely)
  • the juice of 1 orange, strained
  • 1 teaspoon of vanilla extract (the one from the supermarket is fine but get the extract not the essence)
  • 1 teaspoon of cinnamon powder
  • 100g dark chocolate
  • 100g white chocolate

Beat the cream cheese in an electric beater until there are no lumps. Add the sugar and dissolved gelatine and beat until the sugar is dissolved. Add the cream and vanilla and mix gently. Beat the mixture on medium speed until very soft peaks form. Melt the white and dark chocolate over simmering water or in the microwave. Divide the cheesecake mixture and add the dark chocolate and cinnamon to one and the white chocolate and orange juice to the other. The white chocolate mix might need some more time in the beater to come together. Spoon big dollops of each mix onto the crust and then make swirling patterns with a knife or a skewer. Place in fridge to set for at least four hours. To serve, lift out of the tray by the baking paper and cut into squares with a heavy knife.

NB - I put this in the on New year's eve as it wasn't quite firm enough to cut. It was delicious frozen too. Nice on a hot night.

can't be stuffed banana bread

This has to be the easiest, and I mean really, really easy, easiest baked good I have ever made. Seriously the hardest bit is peeling the bananas (which I guess can be almost tricky if they are frozen or very black). I do believe Grace could make this recipe pretty much by herself if she was keen, except she told me she doesn't like it because it has too much banana in it. Everyone else has said it is very nice. This bread also keeps very well in the fridge (and would freeze well), so I tend to double the quantity and make two loaves. Perfect for using up very ripe bananas. It is quite sweet, so I reduced the sugar quite a bit from the original recipe and I think you could reduce the sugar even more depending on how sweet the bananas are.

Last time I made this, I included some vanilla, some fresh nutmeg, some cinnamon, sultanas and a few leftover walnuts we had floating around the cupboard. The time before I put the scant remains of a packet of chocolate chips in. Sultanas are always good. But the optional extras are entirely optional, the bread still tastes lovely without them.

can't be stuffed banana bread

Ingredients

1x

2 bananas
2 tablespoons of golden syrup
1/2 cup of brown sugar
1 egg
1 cup self raising flour (I use wholemeal)
pinch salt

2x
4 bananas
tablespoons of golden syrup
1 cup of brown sugar
2 eggs
2 cups of self raising flour
pinch salt

possible optional extras

vanilla extract
nutmeg - best cut from a whole nutmeg with a sharp knife - a whole different taste experience
cinnamon
orange zest
chocolate chips
sultanas
chopped walnuts

To make


  • Line two small loaves with baking paper or grease well. Preheat oven to 180C.
  • Using a good size mixing bowl, mash the bananas.
  • Add golden syrup and sugar. Stir. Add egg, flour and pinch of salt. Mix well. Add in any optional extras. Mix well.
  • Pour into loaf pans and bake for about 30 minutes or until skewer tests clean.
  • Rest in tin before turning onto a rack to cool. Store in fridge wrapped in the baking paper and a plastic bag or tea towel.

How easy was that! The perfect snack as it is or with a touch of butter.

ps - it is called "can't be stuffed banana bread" because the weekend I first made it, G was suggesting (quite strongly) that I make something with the rotting bananas we had. They were so awful I thought it wouldn't work so I used the most basic recipe I could find. Because I really couldn't be stuffed. And lo it was good. A few adaptions and changes, and there we have it.

fig and almond tart, with orange and chocolate

I used to make almond and fruit tarts regularly when we had the cafe and thought that this year I might make one with apricots or peaches, or berries even. But the fruit and the urge never seemed to combine and the almond meal sat in the back of the fridge mocking me. Then one day about three weeks ago, I knew I had to make a tart that weekend. So I made a big batch of pastry (enough for two tarts still in the freezer) and enough almond filling for two tarts (all gone). When I went to the shop to get some peaches, well .... they were as hard as rocks and I knew in my heart that they would disappoint. But there were some figs. Gooey white figs. Cheap. So I bought more than I thought I could possibly use and me and the tart, we were on.

As I started assembling the filling, I had two brainwaves. What about some chocolate? Just a little bit. As it happened there was 70g of Lindt 70% in the fridge. Only because someone had given it to Grace and therefore I wasn't allowed to eat it all. But Grace was happy with just a piece and said I could use the rest. Then I thought, oh I know, the almond filling really needs a citrus note. Lemon would be too sharp, but orange would be good. Having no oranges in the house and reluctant to go to the shop again, I looked wistfully out the laundry window at our neighbours laden orange tree. Oranges that just fall to the ground and rot. So, I went and knocked on the door. He seemed a bit embarrassed - perhaps he'd been napping in his underwear - and said that the oranges were sour but to help myself. So I did. And they were perfect.

Indeed I think I would say that the tart was pretty close to perfect. It finished cooking just before we went to dinner in the park. Later I dashed home and collected it. We ate it all.* The kids didn't even get a look in.**

You will need

  • A good plateful of ripe figs, peeled or not according to your preference. I peeled on this occasion.
  • 1 tablespoon give or take of orange zest (no white bits) finely chopped
  • 50g dark chocolate - 70% cocoa or more, finely chopped (eg Lindt or Black and Greens)
  • 1 quantity of frangipane
  • 1 quantity of biscuit crust

To make

  • Preheat oven to 180C and grease a 28cm tart tin.
  • Line tart tin with biscuit crust. No need to roll it out. Just press it in with your fingers. Try not to make it too thick anywhere. Trim.
  • Bake (absolutely no need to bake blind) until crust starts to colour and puff up a little.
  • While tart crust is baking, prepare the frangipane. If you are using some plain frangipane from the fridge or freezer, add the orange zest and mix well.
  • Peel figs. Or not. Try not to eat too many.
  • When tart crust is ready, remove from oven and press out any really puffy bits with the back of a spoon.
  • Scatter the chopped chocolate on the base of the tart.
  • Dollop spoonfuls of frangipane in the crust.
  • Place figs on top.
  • Bake until almond filling doesn't wobble very much in the middle. Or a bit longer if you would like the tart to be very firm. I quite like a bit of goo in the middle.
  • Allow to sit for at least 30 minutes before removing from tin.
  • Delicious warm with cream. Or cold the next day when to tart would have firmed up.

* This tart was shared between 16 adults, but really there are 8-12 good serves. Between 16 the slices were a bit measly.
** But I made the kids a chocolate beetroot cake this weekend which was received with a great deal of enthusiasm. Recipe is still under development.

frangipane

This is a lovely filling to use in a fruit tart. Sometime I have ground the nuts myself which makes for a more textured filling with a lovely fresh taste. Most of the time though, I use ground almonds from Hassoons, which has them in the deli section. It's important to use fresh ground nuts, not ones that have been sitting around in a supermarket for ages. As for the sugar, well white sugar gives a paler colour and is good for delicate flavours but brown sugar is nice too.

I've given quantities for one for two tarts. As the mixture keeps for a few days in the fridge or you can be frozen, I tend to make the bigger mix. Which works better in the kenwood. And means I can make another tart with half the faffing.

You will need

1x
125g butter
150g caster or brown sugar
200g ground almonds
2 eggs
flavouring such as finely chopped orange or lemon rind, 3 tablespoons of brandy or some other liquor.

2x
250g butter
300g caster or brown sugar
400g ground almonds
4 eggs
flavouring such as finely chopped orange or lemon rind, 6 tablespoons of brandy or some other liquor.

To make

  • Cream the butter and sugar and add any flavourings
  • Beat in the eggs
  • Mix in the ground almonds
  • Tarts filled with frangipane should be baked at 180C until the top is golden and the centre feels cooked (or nearly cooked if you don't mind a slightly gooey tart).